Textured Bird Collage Tutorial by Ellie Knol

Ellie here today,
so soon after the start of the month, the new moodboard and challenge post just yesterday.
Did you see all of the beautiful inspiration?
If you followed the link to my blogpost from yesterday, you would've seen that I made a promise.
I promised to tell how I've stamped these birds.
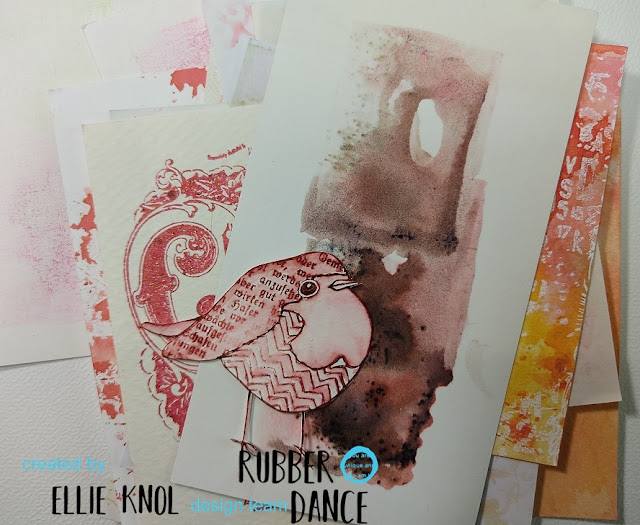
It's not difficult at all: stamp the bird with Aged Mahogony Distress Ink onto a good quality of watercolor paper.
Wet a small watercolor brush and gently wet the areas you want the color to flow into with the brush, by just touching the edge of the stamped line.
I chose to leave the image in the stamping tool while doing this; just in case I had to re-stamp the image, but that was not necessary.
The bird I've used for yesterday's card was done the same way, only it was stamped with Vivid Plum, and color added to the breast and tail of the bird with the same Distress Ink.

I fussycut the bird, with no white edges. This was the first step for this card, but I did not have a background ready to go with it.
My tip for you today is : make backgrounds as you go, don't throw them out if you do not use them straight away, but save them.
I have them sorted by color. Easy to find and also easy to match with other product. Works for me!
My tip for you today is : make backgrounds as you go, don't throw them out if you do not use them straight away, but save them.
I have them sorted by color. Easy to find and also easy to match with other product. Works for me!
What I did, was go through the stash to see if there was any background that would emphasize the beautiful bird image, in other words, a background that made a good match. You can see the collage above, a total of 9+ were great!

What did I add?
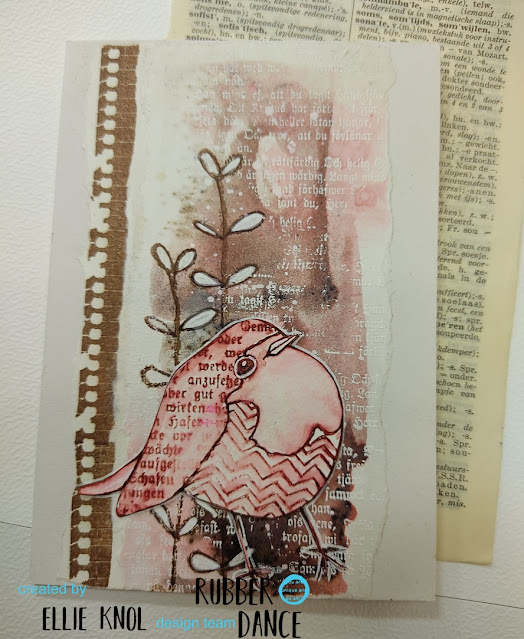
White heat embossing with a script stamp, the Old Book Page stamp.

I also stamped the foliage from Pencil Marks #1 in a dark brown, and added white acrylic paint to the leaves for more contrast.
To have the same color value as the brown in the background I added a little extra contrast to the bird with a dark brown fineliner.

Finally, I stamped the edge from the Grungy Borders stamp set onto a separate piece of paper, tore all of the edges (also the 2 side edges of the background) and adhered it all to the card base as shown.
A plus when tearing the edges is that if your card base is the same color white as the background, you can hardly see the edges.
Not difficult is it?
Have fun!
Rubber Dance Stamps:


Comments