Posts

Showing posts from September, 2019

*Get whale soon* - Giftbag ► Majo

Image
Hello my crafty friends, today I will show you how I made a gift bag with the fun stamp set *Whale Wishes* . I will give this bag to one of my friends along with a "Get Well" card and some treats.   I started by stamping my main images on watercolor paper and masked them with Schmincke drawing gum.   I applied Distress inks in Spun Sugar, Tumbled Glass and Bundled Sage and spritzed it with some water to make the texture look a little more rough.   I stamped the bubbles with white ink from Stampin' Up and heat embossed them with Stampendous Detailed white embosing powder. I also added the small circles from the set.    After removing the masking fluid, I started to colour the images a bit with the shades I used before and I also added more texture to the background with the smaller bubbles stamp.   I added a piece of cardstock with the sentiment with pop dots, adhered the panel to the bag and here we go, ready is my little gift b

An art journal spread tutorial with Textured Mushrooms by Saadia Nawaz

Image
Hi Everyone, Saadia here with an art journal spread. I hope you like it. Art journal spread  This spread was inspired by the beautiful colors of Autumn. Rubber Dance stamps provided me with the stamps to work with, but the opinions I share here, are solely my own. I made this spread in a Dylusions small journal. I applied white acrylic paint through a stencil by The Crafter's workshop. Next, I applied ink sprays in brown, green and orange. The white acrylic paint acted as a resist for ink sprays. Journal spread  Background stamping was done with  Mix a sentiment stamp I stamped the mushrooms from  Textured Mushrooms stamp set . I colored them with alcohol markers, fussy cut and glued them onto my page with gel medium. Art journal  Added a title from  Mix a sentiment stamp . Finished the spread by adding few paint splatters. That's all for now. A reminder that we have a challenge that goes all month on our face book page which you ca

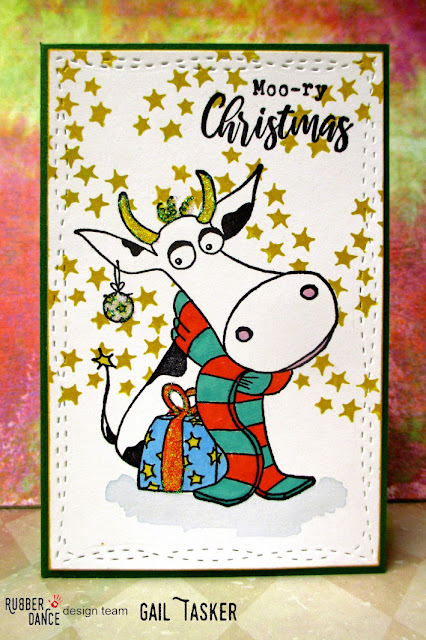
Moo-ry Christmas

Image
Hello Rubber Dance friends.  Gail here today to share a quick and easy card using the very cute Christmas Cow stamp set.  This set contains the main image, a sentiment and also a little star cluster stamp for a perfect and complete creation. I stamped Christmas Cow on a stitch-die cut panel with Black archival ink and masked.  I stamped the cluster of stars randomly using Dandelion archival ink. I removed the mask and coloured the cow with Promarkers and glitter glue for some festive sparkle.  I stamped the sentiment at the top and added a wash of Stormy Sky distress ink to ground the main image.  A dark green card base and done.   Thanks for stopping by.   Don't forget to link up your makes using Rubber Dance stamps in the fb group for a chance to win a €15 voucher to the store.  Hugz Rubber Dance links: Website Facebook Pinterest Blog Instagram YouTube

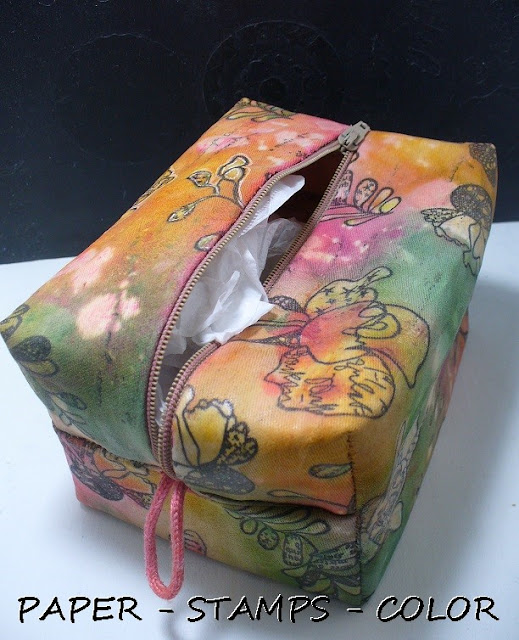
Boxy bag by GDT Ellie Knol

Image
I was inspired by DT member Evelyn to take away the dust from my sewing machine.  She showed the making of a boxy bag in her blogpost " Something slightly different with Grungy Butterflies ".  So I decided to give that a go with the Doodle Flower stamp set and the  Vintage Script . I thought I was going to keep the flowers white if I covered it with a medium first. It helped a little, but color seeped to the back of the flowers too; that's fabric...  I tried to get the flowers white with some bleach.. that didn't work.. I thought maybe Twinkling H2o's don't react to bleach ...  I was a bit fed up with it, and decided to splatter the bleach onto the background.. suddenly white splashes appeared everywhere.  I think the reason it did not react to the bleach is because I ironed the fabric to dry after the inking. ... Propably the color went into the medium and made it permanent ... I like the splashes anyway... 

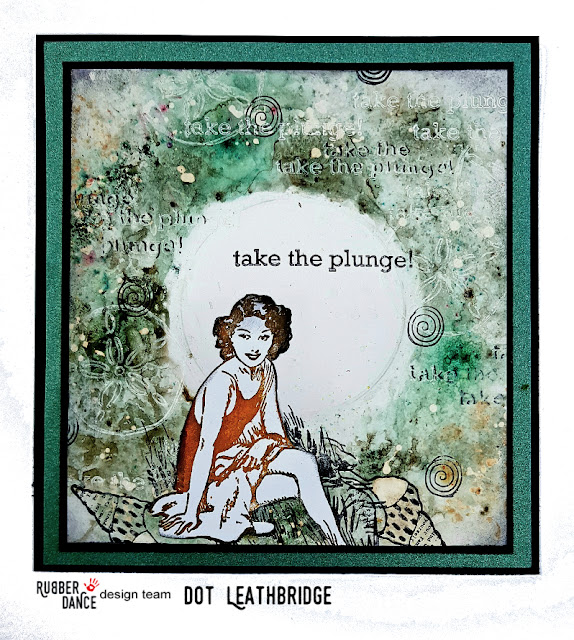
Take The Plunge With Rubber Dance

Image
Hi everyone, it's Dot here, welcome back for another fun technique using Rubber Dance Stamps. Today I've made a card using Bister on glossy card for you using a drinking glass to create a white area. This one was heaps of fun to play around with! The background was created by placing a drinking glass into the center of the card then sprinkling a little Bister around it. Not too much though. A little goes a long way. Spritz a little water to activate it and let the magic happen. I've also added some Colour Burst powder for a different green. When the water was added it created some extra little pops of colour. I was surprised to see pink appear! I've stamped words from Take the Plunge stamp set using Hero Arts white ink. A little bleach was flicked here and there just for fun. I fell in love with the look so far - do you ever make a background and just want to keep it as it is? ... but it was time to add the main image. The gorgeous

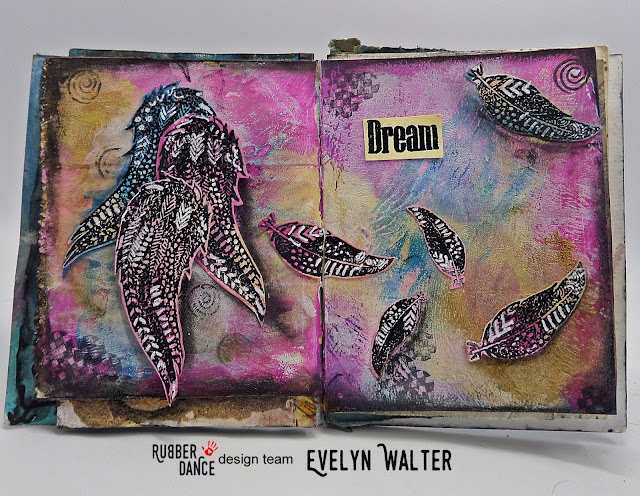
Happy Journal Page 8 with Dreamcatcher Stamp Set by Evelyn

Image
Hello lovely Rubber Dancer, it´s  Evelyn  here today! Time for a new page in my Happy Journal. This time I used the beautiful stamp set "Dreamcatcher" . It´s a pretty simple page, but I like how it looks! I prepared the pages with white Gesso, spreat acrylic paint randomly and toned everything down with Gesso.  The feathers from the Dreamcatcher  stamp set are stamped with embossing ink and heat embossed with black embossing powder and fuzzy cut. I glued everything onto my page, stamped here and there with the tiny texture stamps from the set, highlighted with a white Posca Pen and shaded with a black charcoal pencil. That´s all! If you want to see how I created this page, you can watch the process video: Here are some close ups: Stamps from Rubber Dance: Dreamcatcher Thank you for your visit today! Please don't forget that we have a challenge each month. You can find the challenge here in the facebook group

Textured Mushrooms cards by Mariken

Image
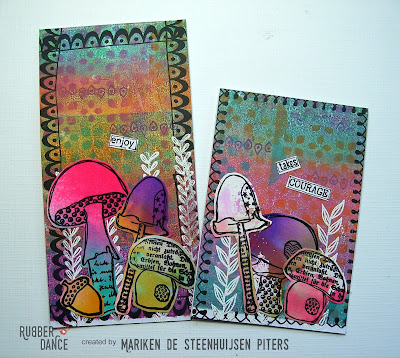
Hi everyone!  Mariken here. Today I have some cards for you. I started with the larger ones and the small ones are left-overs. I didn't want to waste them!! First I colored my paper with Tommy Art Ink, these are sprays like Dylusions. I stamped the beautiful Mushrooms with Versafine and cut them out.  For the background I used my gelliplate, a stencil and Ranger Distress oxide inks in different colors. Let it dry and then stamp the leaves (Doodle Borders #2) and heat emboss them with white powder. When this is done you can add the Textured Mushrooms on your card. I stamped the sentiment on a piece of white card stock and cut them out. I added a thin black line with a marker. Finish your cards with the borders you like (Doodle Borders #1 and #2). I have used the following stamps: Please don´t forget that we have a challenge each month!  You can find the challenge here in the  facebookgroup Rubber Dance St

Easy Aqua Flow Water colouring Cards by Gerry

Image
Hi lovely Rubber Dance friends, it's Gerry on the blog today and I have two cards with the Rubber Dance Crazy Flowers and a super easy watercolour technique for you. And of course I used my Nuvo Aqua flow pens, they are fun and come in gorgeous colours and super easy to use.  The watercolour technique is super easy to do with the Aqua flow Pens. And you can make a card fast with a fun watercolour look. So be sure to watch the video to see how this is done. I stamped the Crazy Flowers with Black Archival ink on Craft Perfect Ultra Smooth Card. I used the Tim Holtz - Stamp Platform to stamp the flowers a few times to get a nice dark image I used the Nuvo Aqua Flow - Dream in Colour set to colour the background and the flowers. I used the Nuvo - Aqua Flow - Water Brushes to blend the colours together. I used Dina Wakley Media - Gesso - Black and diluted it a bit with water from the  Distress Sprayer and made splats with a Nuvo - Nylon Brush