Posts

Showing posts from August, 2022

Atc´s Colorful Leaves
Image
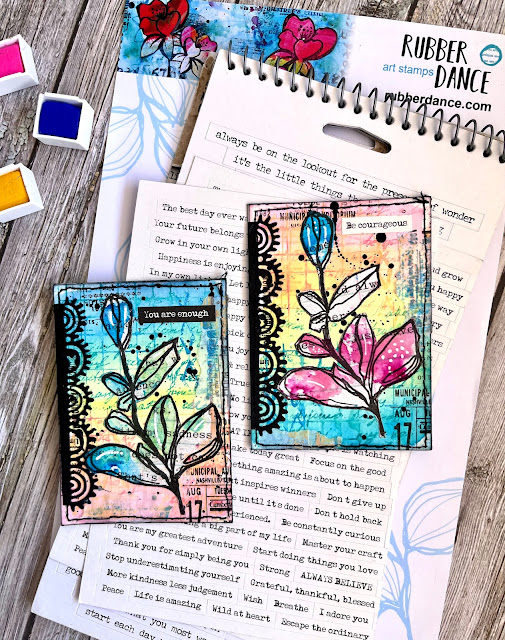
  Hi, I'm Vero (@ Vero.kt) and I welcome you to today's inspiration. How's everybody ? I've been playing   with   Mixed media marks 1 , Pencil marks 3 , Sketchy Leaves  and  Mixed media marks 2    to  create a  colorful Atc´s that I hope you like .   Very easy to do, we started. We cut watercolor paper to a size of 2.5 x 3.5 inches, if you prefer to work in cm, 6.4x8.9. In my case, the paper is smooth and hot pressed, and I color the backgrounds with pigments. W hen the backgrounds dry (we can speed up the process with a heat gun) we will add texture and depth with different inks, in my case I have used distress oxide.To start, I choose a stamp from the  Mixed media marks  , apply the inks, spray water, and stamp, (I'm not looking for definition, I'm looking for a watercolor effect, watery).Help myself with the dryer and go back to stamp with different inks, to continue adding depth and texture. One of the parts ...

Be Awesome Today by Lisa

Image
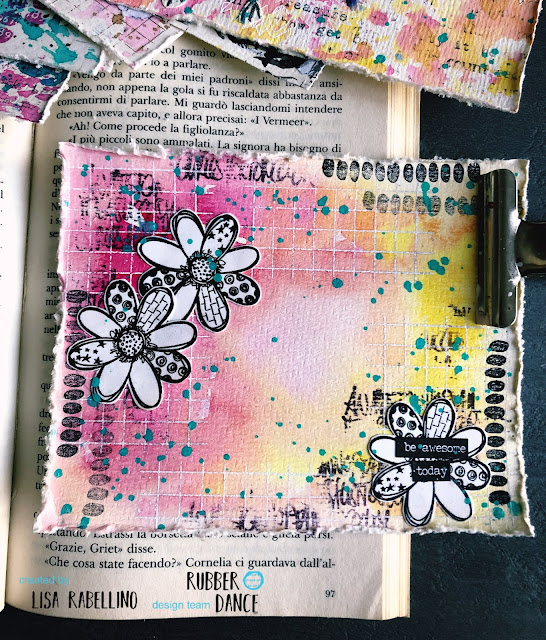
 Hi everyone!  I'm Lisa and I welcome you to my new art journal inspiration. Today I played with Textured Flowers Clear stamps and Mixed Media Marks #1 Clear stamps. First I used the grid on my watercolor paper with white embossing powder and then I added some watercolors to the background. I made some marks with archival inks. Then I added some flowers from Textured Flowers Clear stamps set and a sticker with a sentiment. For the final touch I made some splatters with teal liquid paint for a little contrast. I used these products from the shop: https://www.rubberdance.de/clear-stamps/mixed-media-marks-1-clear-0001/#cc-m-product-14534935433 https://www.rubberdance.de/clear-stamps/textured-flowers-2022-clear-0014/#cc-m-product-14541097633 I hope you enjoyed my new art journal page for you today! Hugs, Lisa 

How to improve an ugly background by Priss

Image
Hello, I'm  Priss  and I welcome you to a fun Tutorial improving a background that I didn't  like the first time.  Do you remember this art journal page I made for March ? Well, when I did the background the first time, it didn't turn out the way I expected. The Resist Technique didn't work well with the clear embossing powder, so I did it with Gold EP. But here nothing is thrown away, much less failed backgrounds. So I saw the failed background and my first idea was to make two labels. I cut the paper into two 2.5-inch stripes and punched them out with a tag puncher. I feel that my backgrounds need more light and elements that make a contrast. That's why I decided to stamp some rainbows of the set  Carved Collection 1 ,  with violet and yellow inks over silk paper. You know I love to use silk paper over my backgrounds. Then I glued  the rainbows and stamped over the tags with stamps of the set  Pencil Marks 5 . After that, I chose some Posca pens...

Junk Journal Page by Angie Coomber

Image
 Hello arty friends! I was recently gifted a beautiful little junk journal by a friend and have been enjoying playing in it so this is one of the pages. This particular page is a envelope which I decorated. I also made a matching tag to go in the envelope. I started by embossing the envelope and envelope flap separately (I put some waste paper underneath so as to not emboss anywhere else). I made a tag from a piece of card and a gelli print. I embossed the tag using the smaller tree stamp and one of the shapes from the stamp set. I also embossed the edges. Next I added some black splatter, doodled around the edges with a black pen, added some "confetti" and apiece of string on the tag. Finally I looked for a quote that I could split between the envelope and tag. Hope you like it! Until next time, hugs from Angie x Stamps used: Carved Collection #4

Dreaming Cat Card by Farida

Image
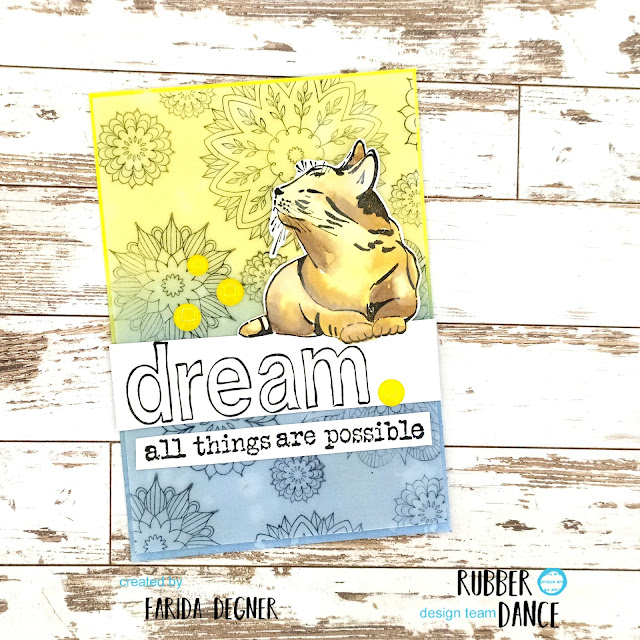
 Hello lovlies, so happy to welcome you on the blog again. Hope you are doing well? This time I got a video for you again, showing how I assambled this card.  I prepared a piece of vellum, that is slightly smaller than my card base, by stamping several mandalas from the Mandalas Stamp set .  And the sentiment from the Affirmations set were stamped on some white cardstock.  Before the card is ready to be assambled I had so stamp and colour the Garden Cat by using my watercolours.  And here is my Reel on how I assabled the card. Enjoy and happy crafting. Farida

How to use gelli prints for easy background for tags

Image
Hi,  today I have for you inspiration how to use gelli prints in your crafting. I think everybody who loves gelli printing has got stash of nice prints and no time to use them or no ideas  ....  maybe? I love to use them the easiest way - make collage for any type of background. All my gelli prints were made with Rubber dance stamps, because they are top quality and perfect for gelli printing.  Today I will show you 4 tags with collaged background. I will not list specific products, just use any of your Rubber dance stamps (I used many of them) , I also have always in my drawer stamped and heat embossed images to be coloured or for to be use as focal points. And when I have idea for some project is it so handy to use them.  Each tag is die cut from black or classic watercolour paper (it is Sizzix die designed by Tim Holtz). 1. At my tag I glued with basic stick glue teared gelli prints to make collage, than I took stamps and embossing ink and white embossin...