Posts

Showing posts from July, 2022

Doodle Flowers Atc´s

Image
Hi, I'm Vero (@ Vero.kt) and I welcome you to today's inspiration. How's everybody ? I've been playing  with   Mixed media marks 1 ,   Pencil marks 3 ,  Mix a sentiment 2   and   Doodle Flowers     to  create a  colorful Atc´s that I hope you like . Very easy to do, we started. We cut watercolor paper to a size of 2.5 x 3.5 inches, if you prefer to work in cm, 6.4x8.9. In my case, the paper is smooth and hot pressed, and I color the backgrounds with pigments. W hen the backgrounds dry (we can speed up the process with a heat gun) we will add texture and depth with different inks, in my case I have used distress oxide.To start, I choose a stamp from the  Mixed media marks  , apply the inks, spray water, and stamp, (I'm not looking for definition, I'm looking for a watercolor effect, watery). Help myself with the dryer and go back to stamp with different inks, to continue adding depth and texture. One of the parts that I enjoy the most is the composition, I have t

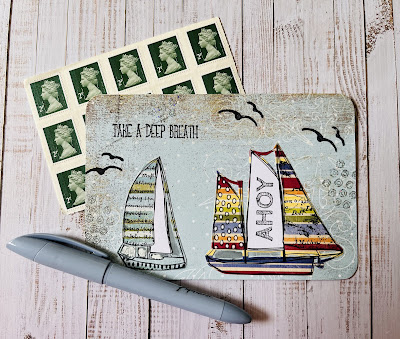
Seaside Postcard by Angie Coomber

Image
 Hello arty friends, How is your summer going? I received the lovely Ahoy stamp set recently and just had to make a summery postcard. I dug into my box of old scrapbook papers and picked out a few that I thought were right for my this. I also have a tin of watercolour postcards so I used one of these. I chose on of the papers for the background (if you look closely you can see it’s actually a Christmas one!) and the others for the boats. Next I stamped the boats on the patterned paper as well as some white paper. I cut out the coloured boats and some of the sails from the white ones, which I glued to the coloured boats. I then glued them onto the background. Finally I added the seagulls and the quote, as well as some embossed background stamping and the word on the sail. I hope you like it! Until next time, Hugs from Angie x Stamps used: Ahoy

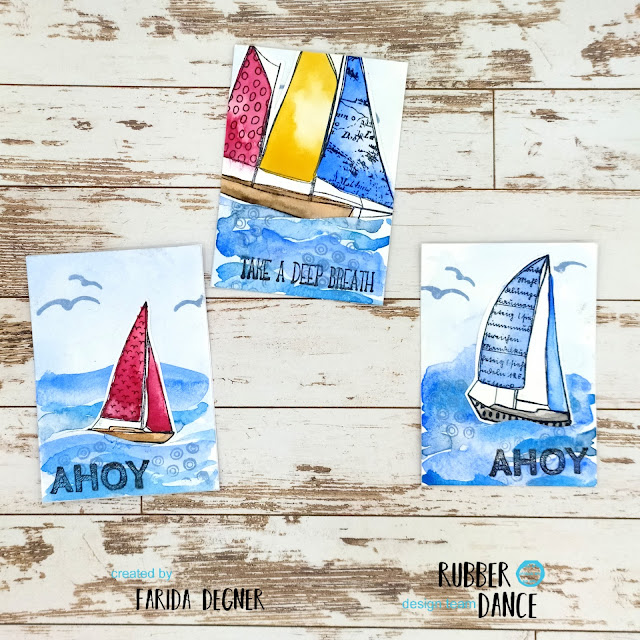
Carving for the sea - ATC cards by Farida

Image
 Hello lovlies, happy to see you here again. Are you enjoying summer? I had been sick the last couple of days and was looking foward to see the sea  again. This brought me to the idea of creting some sea-themed Artist Trading Cards using the amazing Ahoy- Stampset . Because I wanted to use some watercolours, I stamped the three diffrent boats on to watercolour paper.  Just did some easy colouring on them, using red, yellow and blue for the sails.  For the ATC card background I used some diffrent blue shades and a lot of water for creating the sky as well as the waves.  After letting the background fully dry I added some circle stamps onto the sea background and some flying gulls to the sky. Because I wanted to add some kind of movement to the image I used my knife to make a wavey slit into the background. So i could pop in the boats a little bit. For the finishing touch I added some sentiments to the cards.  Now I have even more yearn more for being at the sea....off couting the days n

Quick art journal page

Image
 Hi friends!  Lisa today on the blog with a new art journal inspiration for Rubber Dance design team! To start I glued some pieces of patterned papers on my page and I brushed a coat of clear gesso. I chose Mixed Media Marks clear stamps and I made some designs with archival inks. I made some scribbles with a black watercolor pencil and I chose a moth from Inky Friends stamp set for my focal point. Finally I added a sticker and I made some splatters with white liquid paint. I used these products from the shop:  https://www.rubberdance.de/clear-stamps/mixed-media-marks-1-clear-0001/#cc-m-product-14534935433 https://www.rubberdance.de/big-sheets/inky-friends/#cc-m-product-14383086833 I hope you enjoyed my art journal inspiration for you! Hugs, Lisa 

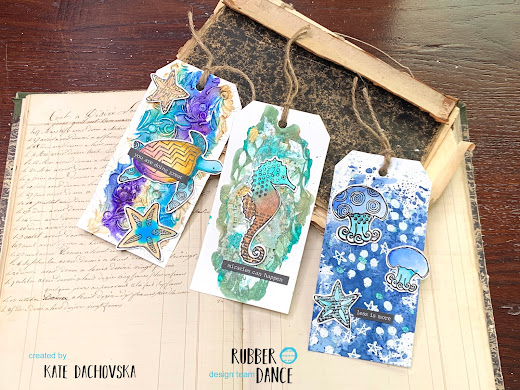
In the deepest ocean - 3 tags by Kate

Image
 Hi,  today I have for your inspiration  mixed media tags. They look like very time consuming work but they are so easy I will describe to you each of tag.  For my tags I used: Textured sea creatures - clear stamps and Pencil marks 2  - each tag is die cut from heavy weight watercolor paper, all images are stamped (at watercolor paper) with Versa fine onyx black and heat embossed with clear embossing ink - it is great when you want to make some watercoloring, my sentiments are printed at computer 1. tag - stamps dots and stars with clear embossing ink and sprinkle over it white embossing powder and heat set it - take some of your favourite distress inks and use classic smooching technique, dry it - with the same distress inks colour images, add sentiment and with 3D foam tape glue them - as final touch you can add some sparkling Nuvo drops - add string and sentiment 2.tag - die cut tag and use some of your favourite 3D or basic embossing folder - add here and there Distress crackle p

Atc´s Inky Flowers

Image
    Hi, I'm Vero (@ Vero.kt) and I welcome you to today's inspiration. How's everybody ? I've been playing  with   Mixed media marks 1 ,   Pencil marks 3 ,  Round in circle  and   Inky Flowers     to  create a  colorful Atc´s that I hope you like . Very easy to do, we started. We cut watercolor paper to a size of 2.5 x 3.5 inches, if you prefer to work in cm, 6.4x8.9. In my case, the paper is smooth and hot pressed, and I color the backgrounds with pigments. W hen the backgrounds dry (we can speed up the process with a heat gun) we will add texture and depth with different inks, in my case I have used distress oxide.To start, I choose a stamp from the  Mixed media marks  , apply the inks, spray water, and stamp, (I'm not looking for definition, I'm looking for a watercolor effect, watery).Help myself with the dryer and go back to stamp with different inks, to continue adding depth and texture. One of the parts that I enjoy the most is the composition, I have to

Row of Textured Houses by Ellie Knol

Image
Ellie here.. I have a fun tutorial for you today..  The how-to:  - Find or create an A5 sized background with a darker and a lighter part as shown.  - Cut the lighter part to size as the background, in my case it measures 10 x !4,3 centimeters. - Stamp the houses on the rest of the colored cardstock.  - Fussycut all of the houses.  - Add white highlights to all of them with a white gelpen.  - Stamp some doors and windows on a leftover piece in an opposite color, for example a yellowish window for a bluish house and vice versa. Fussy cut these too.  - Add extra color to part of the houses in corresponding colors.  - Adhere the fussycut windows and doors to the houses. Also stamp a bigger window and adhere it onto one of the houses, just for fun.   - Stamp Mixed Media Stamps to the background with corresponding colors and a grey.  - Adhere all the houses to the background, I chose to stick 3D tape to some of them for more interest.  - Add a happy quote to the card.  Happy creating,  Elli