Posts

Showing posts from March, 2020

Up, Up and Away

Image
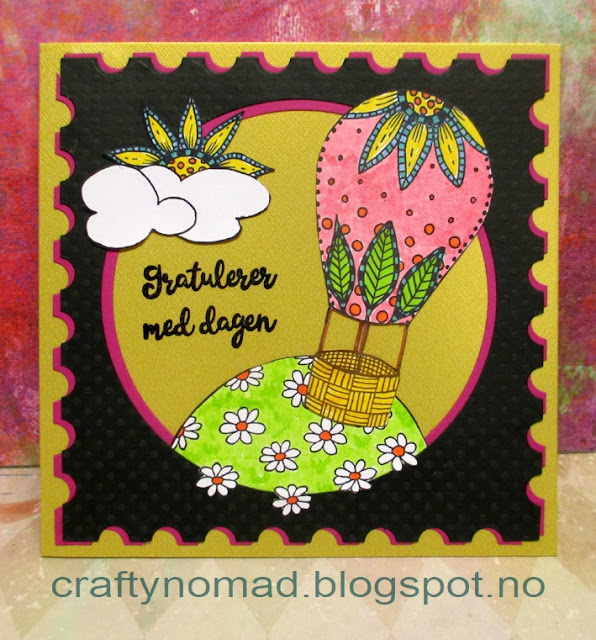
Hello Rubber Dance friends.  Gail here with a card I made the other day using Rubber Dance In The Air and Whimsical Summer stamps and a lot of colour. I started with a gold base card and found a black panel that had this circle aperture already cut.  I cut the edge with a postage stamp die and added a similarly cut hot pink layer.  I stamped, coloured and fussy cut the balloon and sun-flower cloud from the In The Air set.  The hill is from the Whimsical Summer set.  I stamped and coloured it and fussy cut so I could have the flowers spilling out onto the black frame.  I arranged the balloon and flower cloud so they also overlapped the frame and embossed a Norwegian Happy Birthday sentiment to finish. Thanks for dropping by.  I hope you feel inspired to get out your stamps and create something today.   Join the fun and link up your makes using Rubber Dance stamps in the Rubber Dance Stamping Lounge .  See you there!!! Don't forget to check out the Rubber Danc

Watercolor vs Doodle Rudbeckia by Ellie Knol

Image
Good day to you all ! I hope you are doing fine...  Ellie  here  today!  Having only one stamp does not mean you cannot fill a card with it!   Use sticky paper to create a mask of the Rudbeckia stamp from the Doodle Flowers stamp set...    Stamp several images using a mask. I like to stamp with Versafine Onyx Black and heat emboss it with clear embossing powder.  Cut along the top edge of the flowers as shown, leaving a white border.  Color the petals with a liquid watercolor by first wetting the petal randomly (don't cover the whole petal with water). Drop color into the water, one color at a time.  I used Röhrer and Klingner here.   Drop different colors into the water on the wet petal until you are satisfied with the result.  A close up of the water puddle. Leave to dry before continuing onto petals that are next to one another.  Don't cover the whole petal with color, leave some white space. 

A spring themed art journal spread with Textured birds stamp by Saadia Nawaz

Image
Hi Everyone, Saadia here, with an art journal for you. I hope you like it. It is a quick and simple spread, made with two of the new stamp designs released by Rubber Dance: Textured Birds  and  Loose Floral 2 . I made the background with acrylic paints and a stencil. Stamped the images from  Loose Floral 2  and  Textured Birds  on white cardstock. Colored the images with watercolor markers and then glued them on to the journal pages. Finished the spread by adding few marks with markers. That's all for now. A reminder that we have a challenge that goes all month on our face book group which you can find  here Thank you for your precious time. Take care, Saadia Nawaz. Stamps used: Loose Florals 2 Textured Birds

Grungy Swirls ATC with Antique Botanicals Flower

Image
Hello friends!  Mary here with a fun ATC project I made using 3 awesome  Rubber Dance stamps, some embossing powder, cheescloth and Scribble Sticks.  I made a quick video of my process.  I hope you enjoy! Here are some close up pics of the ATC: Here are the stamps I used: Mix A Sentiment #1 Grungy Swirls Antique Botanicals Thank you for coming here to see my process and I hope you got some inspiration for your own projects!  Happy Crafting! Mary xoxo Find me on YT, IG and FB as Motley Mixed Media.

Atc´s Textured Birds by VerĂ³nica

Image
Hi everyone, VerĂ³nica is here. Today I come with a colorful and fun series of Atc´s that I have made with the beautiful  Textured Birds set .  Let's go step by step, so you can cheer up and make your own.I hope you enjoy it and you like it, it is done with great affection. We cut watercolor paper that measures 3 1/2 inches by 2 1/2 inches, if you prefer in centimeters 8,9cm by 6,4 cm approximately. Now we create the backgrounds by coloring with watercolors, pigments, or inks. I have used pigments dissolved in water, to give it a watercolor effect. When they are ready and dry we apply textured paste with some stencils that we like. In my case Distress Textured Paste (crackle). We can use the embossing gun to speed up the process or let it dry. We continue, we are going to stamp these adorable and cute little birds with a waterproof ink. Comes one of the most relaxing and fun parts, the coloring. You can use what you have or what you are used to

Art journal page with Grungy butterflies by Jessica Rosengren

Image
Hello, Jessica here.  Today I will share with you an art journal page, inspired by all the crazy things happening in our world right now. I think we all need some positivity at this moment, I know I do. To add texture to my page I have used some leftover thread I found on my desk and some sequins. I used Arteza gouache paints to color my page, the are my new favorites! The butterflies are stamped on mixed media paper with archival ink and then colored with Lindy´s stamp gang magicals and sprays. I added a title and some word stickers.  It turned into a colorful page with my favorite butterfly from the Grungy Butterflies set and I also framed the page with stamps from the Grungy Borders set. I have a video for you if you are interested in the process. Here are the stamp sets I have used.    Thank you for stopping by! Take care!

A simple Flower Card by Angie Coomber

Image
Hello! Angie here. Today I have a very simple flower card and matching envelope for you. I used a square, cream card and envelope for this. First I used the Mix A Sentiment #2 stamp to create a background on the front of the card. I stamped flowers &leaves onto painted card and then cut them out. I arranged some of them on the card, leaving some space for a quote. I also arranged some more on the envelope, again, leaving space to write an address. When I was happy with the design I glued everything down and added the quote. Who doesn't love some happy mail! Stamps used: Mix A Sentiment #2 Loose Florals #2

Always be amazing - Flowery Embroidery Frame by Dunja

Image
Hello everyone, today I have an embroidery frame that I pimped. It has a diameter of 20cm, lots of space for flowers and leaves. First I put in two strips of vellum and dabbed it with golden ink spray. Then I embossed and dyed the flowers from the Loose Florals #1 Set. I embossed the leaves in turquoise and green and coloured them as well. I love this watercolor effect. Then I cut out everything. After that I arranged and glued everything around the frame. Finally I used the Mix A Sentiment 1 stamp set I hope you like my colorful inspiration. Always remember, always be amazing! Much Love Dunja xx Mix A Sentiment #1