
A Bug's Life, Altered Domino by Katy Leitch
Hi everyone, Katy here again! You may not know that my other hobby (like I need one!) is making jewellery so I thought I'd bring you something a little different today - an altered domino pendant.

Step by step instructions:
 1) Take an ordinary domino and colour with VersaMagic chalk inks, creating a soft background. Dry very well with a heat gun - be aware it will take a while for the ink to set and the domino will get very hot.
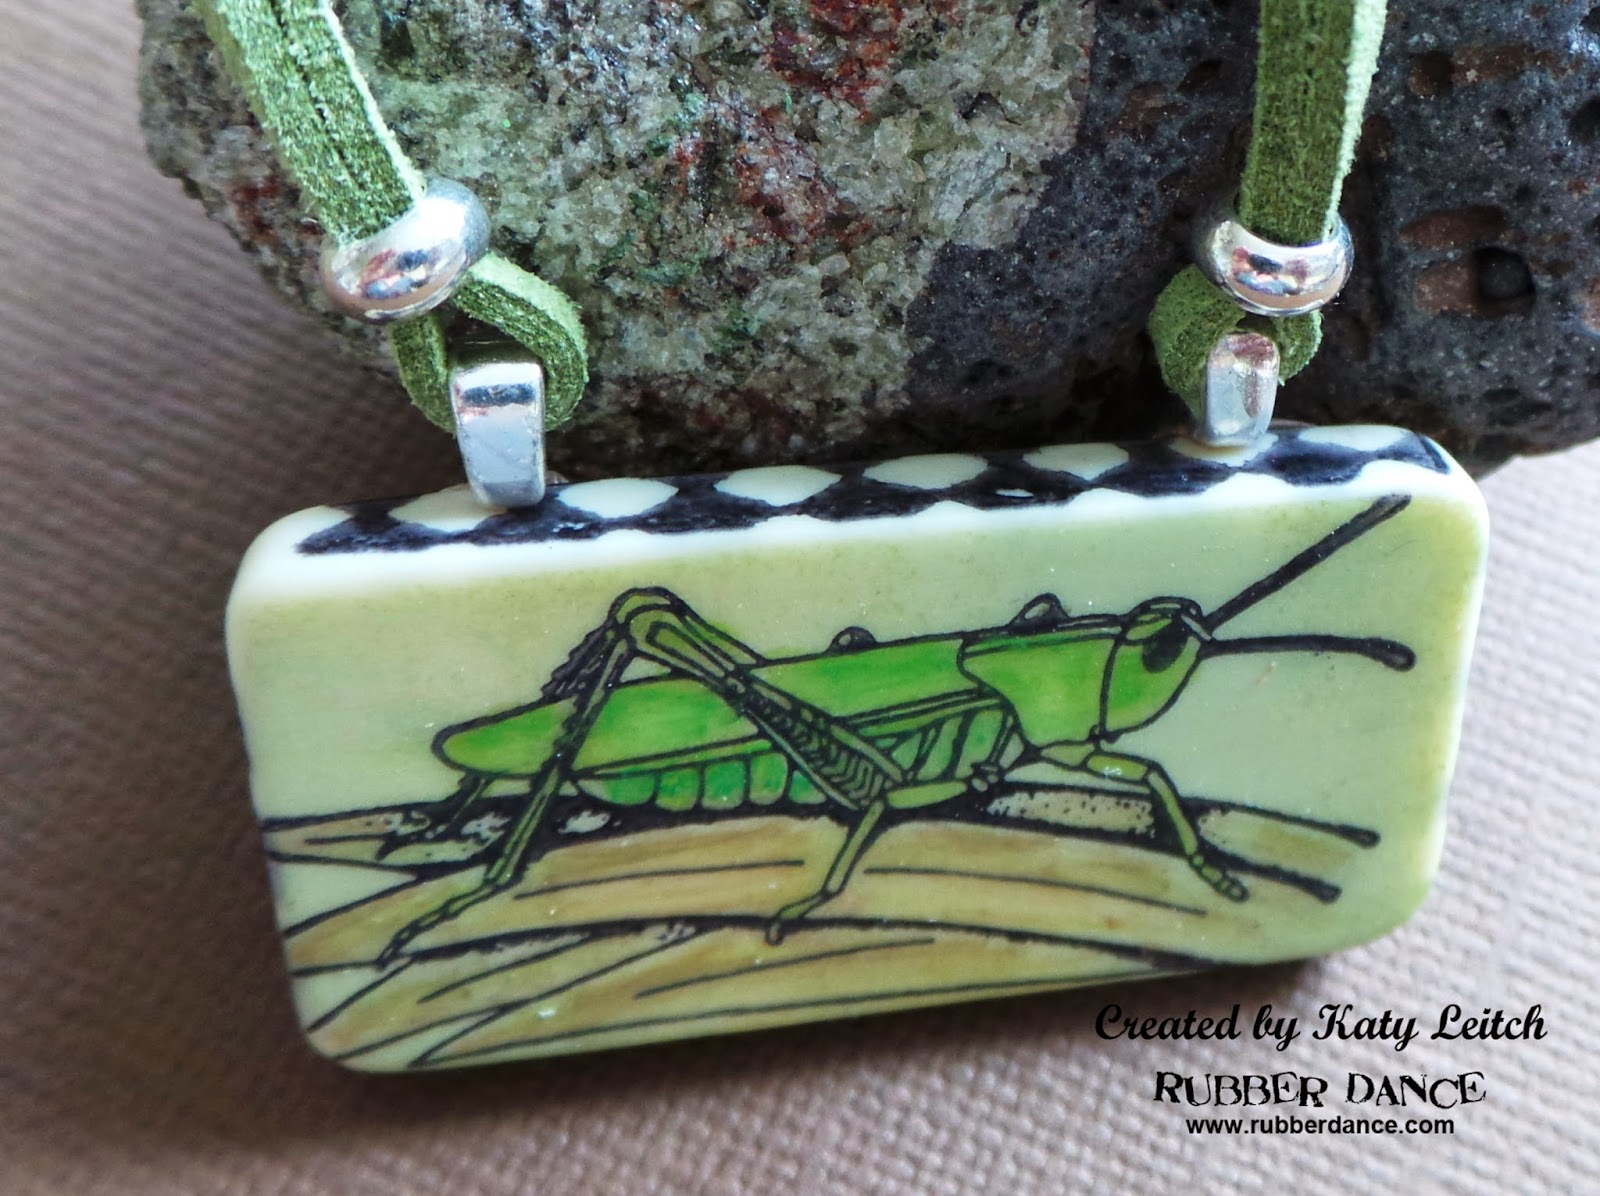
 2) Place the Grasshopper stamp onto an acrylic block and use a permanent pen to mark where the design starts and ends. This helps you to stamp the design centrally on the domino, as the image just fits.
 3) Using the guidelines, stamp onto the domino using permanent ink like StazOn (or you can use an ink you can heat set like Brilliance or VersaMagic).
 4) Colour the image with permanent colouring medium - I used a mix of waxy pencils and Inktense pencils. Use a permanent colour because the glaze will make water-based colours run.
 5) When the pencil or paint is dry, stamp each edge of the domino with the Diamonds stamp. It's much easier to lay the inked stamp face up and press the domino onto it. Dry each side in turn before moving to the next. At this point protect the domino with a coat of varnish or sealant.
 6) Glue some bails to the back of the domino - if you don't have jewellery glue, use silicone or Pinflair as this has some flexibility and won't dry rigid. Thread some cord through the bails and add a clasp to complete.
Top tips!
• Not into wearable stamping? Dominoes make great fridge magnets too - just use strong glue to attach a magnet to the reverse.
• Be gentle when stamping onto a domino - the surface is shiny and it's easy for the stamp to slip. Take a little more care than when working on card or paper.
Here are two more views of the pendant for you.

Supply list:
All the stamps used for this project are from Rubber Dance and can be found on these pages:
Animals A1-4B: Grasshopper
Backgrounds BK1-3E: Diamonds
Other products:
Domino
VersaMagic or similar chalk inks
Permanent black ink
Colouring pencils or paint
Glue bails (x2)
Beads
Cord
Cord end clasp
I really hoped you enjoyed my little project.
See you soon.
Katy x
My blog: http://postcardsfromtheattic.blogspot.co.uk
Rubber Dance stamps used: BK1-3E: Diamonds; A1-4B: Grasshopper
Step by step instructions:
1) Take an ordinary domino and colour with VersaMagic chalk inks, creating a soft background. Dry very well with a heat gun - be aware it will take a while for the ink to set and the domino will get very hot.2) Place the Grasshopper stamp onto an acrylic block and use a permanent pen to mark where the design starts and ends. This helps you to stamp the design centrally on the domino, as the image just fits.Top tips!
• Not into wearable stamping? Dominoes make great fridge magnets too - just use strong glue to attach a magnet to the reverse.
• Be gentle when stamping onto a domino - the surface is shiny and it's easy for the stamp to slip. Take a little more care than when working on card or paper.
Here are two more views of the pendant for you.
All the stamps used for this project are from Rubber Dance and can be found on these pages:
Animals A1-4B: Grasshopper
Backgrounds BK1-3E: Diamonds
Other products:
Domino
VersaMagic or similar chalk inks
Permanent black ink
Colouring pencils or paint
Glue bails (x2)
Beads
Cord
Cord end clasp
I really hoped you enjoyed my little project.
See you soon.
Katy x
My blog: http://postcardsfromtheattic.blogspot.co.uk


Comments
~Olga Kovalchuk
xox
Hugs
Gabriele