Salty Sea Scene Tutorial
Hi folks! It's Bibi here today with a salty card tutorial. The stamps I have used are on sale right now - till 30th of July.
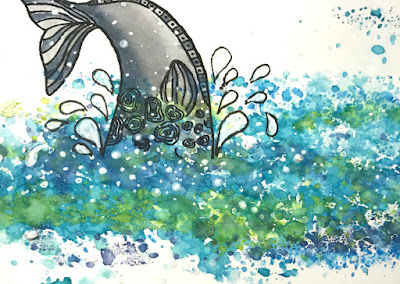
For my card I let one of the new whale stamps play in the water, which I made with Distress Oxide inks
- but I'm sure you can get a similar result with any kind of water based inks (aka dye ink).
Step by step:
I smeared two colours of Distress Oxide (salty ocean, peacock feathers) on a plastic page cover
and sprayed the stripes with a bit of water:
To get the water in the middle of the card, I folded the cardstock like this
... and dipped it into the ink.
(My keyboard in the background is not dirty, it's colourful! It's a result of using ink sprays in front of it ...)
Keep doing this and heat dry between several "dips of ink"
till you're happy with the result.
I stamped half of the whale by placing her on the side of the acrylic block
and added ink on the part I wanted to stamp:
After stamping the whale into the water, I coloured her in using markers.
I doodled some splashes of water around the whale's body and coloured them with a white pen.
I also added some white spots here and there to give more life to the water:
Time to make the sandy bottom of the sea:
I made a mask by tearing up a piece of paper,
used a foam sponge to add ink (Oxide wild honey), and sprayed it with water:
I stamped the anchor from Retro Beach so that it appears to be buried in the sand,
coloured it in, and drew the shadow with a light grey marker:
The green seaweed above is a stamp from Whale Wishes.
I also wanted some die cut seaweed on top for a bit of dimension.
I don't have any seaweed dies so I used pieces from a tree die instead.
Close enough, isn't it?
The shell behind the seaweed was stamped with brown waterproof ink,
coloured in with markers.
I mounted my card on a sea green panel
distressed the edges with a knife
and dipped them in white acrylic paint like this:
Here is my card again,
with sentiments from Whale Whishes (blubb-blubb)
and Retro Beach (salt sea summer fun):
I kept looking at my finished card, feeling it was lacking something ....
and then I remembered my bubble background Dinky stencil from That's Crafty!
I think these blue bubbles ties the card together:
I wish you all a lovely summer!
I have not been to the beach yet, but before long I will be playing in the sea
- like a whale :-)
Big hugs,
Bibi
💕💕💕
The stamps I have used are from these two sets:
These stamps - and more - are on sale, but only for two more days!
Thank you for stopping by!


Comments
Jump in the sea and swim with the whales :-)
Big hug, Anita ♥
Hugs
Donna xx
hugs,Jackie
Hugs and happy crafting to you if you have time :)
Coco xxx