Posts

Showing posts with the label Priss

Bookmark "I Love You" by Priss

Image
Hi Rubber Dance friends!!  Priss  writes you today. Welcome to a fun tutorial using the whimsical roses from the set  Doodle Flowers . First, I chose one of the tissue papers that I showed you in my last tutorial video. If you want to know how to make them go to  How to design your own tissue paper for Mixedmedia . Then I cut a piece of white cardstock and glued the chosen tissue paper on top of it and punch a small hole for the eyelet. Et Voilá! We have an easy and beautiful background ready to play over it with more layers.  Now I proceed to stamp some  Doodle Flowers  on Bristol paper and color them, first with Alcohol Markers and then I give them some lights and shadows with my favorite colored crayons. To give it a more personal look I always end up using black and white Posca markers to make my personal dots and marks. These whimsical roses will be our protagonists, but they need some friends to accompany them so they don't feel alone and ab...

The Adorable Guinea Pig Journal Page by Priss

Image
I'm  Priss  and welcome you to today's inspiration with the cutest stamps by Rubber Dance. You will find more interesting inspirations with the  Guinea Pig  set here . And with the  Night & Day Big  set here , here , and here . This time I created another page for my Rubber Dance Stamps Squared Art Journal. For the background, I used Distress Oxide Inks inspired by the colors of our October Mood Board (Yellow, Orange, and Storm blue). Then I sprayed some water to lift the colors.  To make it more interesting I stamped some marks, with the mini rainbows of the  Carved Collection 1  set, and some black inked borders with the  Mixed Media Borders  set.  As usual, I did some splashes for the finishing touch. This time I used Oxide Inks with similar colors and finally my special mix of white. After that, I applied other markings with a leaf stencil and brown ink. I didn't take a shot of that part, but I'll leave y...

How to design your own tissue paper for Mixedmedia by Priss

Image
Hello, Hello!!! I'm  Priss  and I welcome you to a new tutorial. Today I'll show you how to design your own tissue paper to bring your mixed media backgrounds to life with the fabulous Rubber Dance stamps. First, let me show you some photos of the tissue papers you could design with this tutorial.  But if you're impatient and don't want to wait to get started, scroll to the bottom for the video tutorial. And now it's time to get your hands dirty and create your own decorated Tissue Papers.  You will need:  Tissue paper. Sorry, cause in the video I often call it Silk Paper. Permanent ink. I used Versafine Clair, but you could use your favorite. Just make sure that it's permanent.  Acrylic Paintings. Choose the colors you want. And of course your favorite Rubber Dance stamps. Let the fun begin... I really hope you like it and encourage you to create your own. Sorry about my English. Hugs, Priss ( My Posts  |  Instagram  |  Facebook ) ...

An Art Journal Page for Shine by Priss

Image
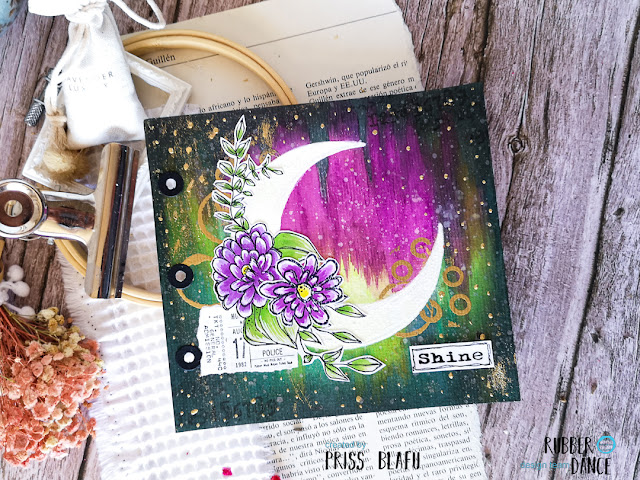
Hello, my friends, Priss here with you. I'm happy to share another art journal inspiration for the Rubber Dance Design Team with pigments, gold embossing powder, and some fabulous stamps!  Here are some photos  I took along the way while making my page. First I cut a half moon out of paper, with two circles, and used it as a mask. Then I painted with pigments diluted in water as if they were watercolors. I applied a bit of black ink to the edges to make them darker. I also splashed on some sparkle white paint to simulate the stars. To make my scene more whimsical, I stamped the circles from the  Mixed Media Circles  set with embossing ink and applied a gold embossing powder.  I stamped some numbers of  Mixed Media Marks  set in the corners. And also, I made some gold dots too.  I stamped some flowers from the  Sketchy Flowers 3  set and painted them with Alcohol markers and a white gel pen. Now I let you with a few detailed pictures of ...

How to improve an ugly background by Priss

Image
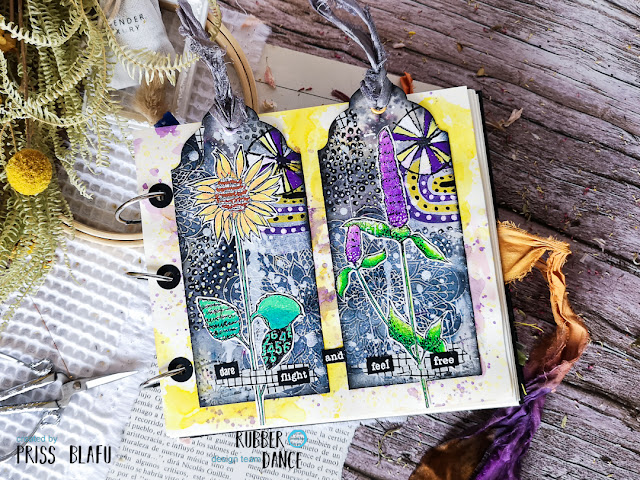
Hello, I'm  Priss  and I welcome you to a fun Tutorial improving a background that I didn't  like the first time.  Do you remember this art journal page I made for March ? Well, when I did the background the first time, it didn't turn out the way I expected. The Resist Technique didn't work well with the clear embossing powder, so I did it with Gold EP. But here nothing is thrown away, much less failed backgrounds. So I saw the failed background and my first idea was to make two labels. I cut the paper into two 2.5-inch stripes and punched them out with a tag puncher. I feel that my backgrounds need more light and elements that make a contrast. That's why I decided to stamp some rainbows of the set  Carved Collection 1 ,  with violet and yellow inks over silk paper. You know I love to use silk paper over my backgrounds. Then I glued  the rainbows and stamped over the tags with stamps of the set  Pencil Marks 5 . After that, I chose some Posca pens...