Posts

Showing posts with the label vintage script

NOVEMBER INSPIRATION

Image
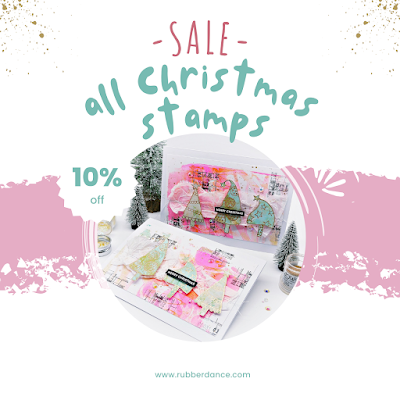
Hello Rubber Dance friends. Gail here today and here we go into November!    Are you a newsletter subscriber???   If you are you will already know about the sale !   Until the 9th of November all our Christmas stamps are 10% off ! Hop over to the shop and grab yourself a bargain for your Christmas crafting.  It's another colourful and inspirational month here on the Rubber Dance blog. The first day of the month so we have a new moodboard.  You can be inspired by anything on the moodboard; one or more colours, things, shapes, memories it inspires, things it makes you feel, etc. etc..  It's basically anything goes, but in case you need a little help to get started Dunja has put together this awesome inspiration for you. Here's the wonderful November Moodboard   If you are creating anything with Rubber Dance stamps this month, whatever your inspiration, please post a new project in our Facebook  group or over on Ins...

Beach Ahoy by Ellie Knol

Image
On this card I tried to create waves by tearing the paper horizontally, and adhering the ships on and between these waves.  White heat embossed script, birds and postal cancel stamp on the dark and colorful background creates more interest.  Just a little color added to the fussycut stamped images with PanPastel make them pop a little.  See you next time, Ellie.    Rubber Dance Stamps: The Rubber Dance Webshop AHOY Vintage P:ostcard Vintage Script

Paper Weaving Sketchy Flower by Ellie Knol

Image
This time I'd like to share this technique I recently learned from a post by Karen Dunbrook :  Paper Weaving.  (I want to give credit where credit is due ) .. Thanks so much Karen for this inspiration! Start out by cutting/using up paper strips of about 1,3 centimeters wide and weave them to form the background ..  I chose to make it slightly larger than I would need, so I could just cut the unneeded part away. No need to glue he whole thing, as long as the edges are glued.  As I used regular cardstock strips, I needed to cover the background with a transparent gesso first, as the color will soak into the cardstock.   I chose to color the image with a ready made watercolor, to have more control of the coloring (from Ecoline and Dahler&Rowney).  I put a kitchen towel underneath while coloring the images to absorb any color that would go through the holes in the background.  To provide a nice backdrop for the weaved paper background I created a ...

SKETCHY FLOWERS CARD by Josi Tomas

Image
Hi Rubber Dance friends!! Josi Tomàs is writing to show you a new tutorial step by step for how to make this beautiful and easy card with the lovely sketchy flower. ______________________________________________ STEP BY STEP 1. First apply acrylic paint with the help of a roller and in two colors over white cardboard or watercolor paper. I chose electric blue and lilac (also you can use white) and my card measures 4 1/2 by 5 inches. 2. I made embossing using shimmering translucent powders and my Distress Oxide ink. Did you know this? Distress ink and Oxide ink they are slow drying inks and used with translucent powders allow you to emboss in many colors. I have also used white powders to combine it. 3. To finish the background I chose the harlequin stamp which I stamped with Distress Oxide in violet and machines sewn the edges.   4. The decoration is very easy to make it. I did different stamps and then I cut them out: a. Sketchy flower on a soft lilac card stock. b. T...

Dream Collage by Josi Tomas

Image
  Hi Rubber Dance friends!! Josi is writing to show you a new project. Do you like collage? I love it! It entertains and relaxes me in a special way and it also helps me to use the small pieces of paper that I couldn't use otherwise and don't want to throw away. It is very easy to do. You only need collections of scrap paper that you don't use because they aren't complete or because the papers are small.   In my case I combined different collections and also book sheets.  I tear the papers in different sizes and I arranged them in a way that I liked the result. I took the opportunity to include the beautiful branch of Pencil Marks 2 (I painted it yellow), the circles of  Grungy Stuff (trimmed on the inside) and the lovely word "dream" of Affirmations .  Finally, to give it and aged look, I have stained it with white paint applied with my fingers and stamped my dear stamp Vintage Script with black ink.     I hope you like it and enjoyed!...

Triptych Journey "FLEURS" by Josi Tomas

Image
  Hi friends!!! Josi greets you in the middle of this hot summer. It is a perfect time to stay home and scrap & mix media... Today I show you a different project. It is a triptych, Can we do it together? _______________________________________ STEP BY STEP  1. Cut out three cards and joint them with painter's tape to form a triptych (mine are 3 1/2 inches wide by 5 inches tall). Apply white gesso and dry.  Note: the whole project is worked on both sides. 2. Apply two colours in spray that can be combined and dry again.   3. Cut out papers that match the previous colour range and glue them in some areas creating a collage. You can also use book paper and texture papers in neutral colours.  4. Integrate all the work by applying white paint in some areas.   5. Stamp some texture stamps in colours similar to the created background and black to stand out. 6. Finally I have decorated with flowers in vellum paper, white embossing and fabrics on the i...