Tutorial Tuesday - A Stencilled Birthday Card by Sue
Hello and welcome to Tutorial Tuesday. It's Sue here with my stencilled card.
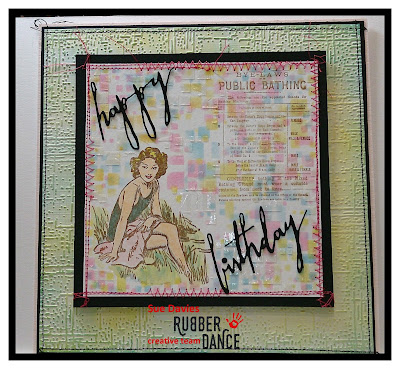
I started by cutting my card to size to match my stencil, then stamped the lovely lady and bathing notice from Take The Plunge with coffee archival ink.
Then I laid my stencil over the top and taped it around the back as I didn't want it to move. This is an irregular stencil with lots of closed spaces. I dabbed all around with Spun Sugar Distress Ink. I went over the notice but tried to avoid stencilling over the lady.
I love this gentle colour and don't use it often enough! I cleaned and dried the stencil really well, then turned it 90 degrees and re-taped.
Then I dabbed through with Tumbled Glass. I'm still trying to avoid stencilling over her.
Next turn another 90 degrees making sure that it's a new part of the stencil and you've not turned it back to where you started. Again make sure that the stencil is clean and dry or the inks could smudge. This time I've dabbed with Squeezed Lemonade. I really like these colours together, and in the places where they touch they will make new colours not mud.
On my final turn, instead of adding another colour, I scraped through some clear texture paste. Instead of putting any excess back in the pot I made sure to throw it away as it had picked up some of the colour from the inks.
To tie it all together I coloured my lady with the same inks and a waterbrush.
I really like how this looks when the clear texture paste dries.
To finish off I added some stitching, some Tim Holtz die cut words, and I embossed some white linen card and gave a light colouring with the yellow and blue for the background. I'm really happy with this, the texture looks fab in real life.
This is the inspiration photo for this month's challenge, I didn't realise that I'd used them until I put the photo's together!
Stamps Used
Have a lovely day, and thanks very much for looking xx


Comments
Hugs
Donna xx