Posts

Showing posts with the label watercolours

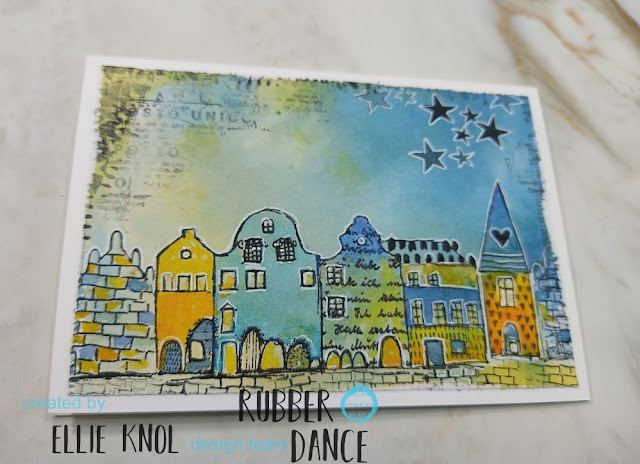
Row of Textured Houses by Ellie Knol - 2
Image
Ellie here today, I hope you are doing fine!  This card has a little bit of a history; one I did not see coming, lol.  Earlier this week I decided I would want to use the  Textured Houses  stamp set for today's post. Got me thinking to search for a suitable background: something with blue on it for clouds and yellow to make it a sunny card. I found a background in my stash, a quite big one of which I cut backgrounds for 2 cards.  Then suddenly I had an AHA moment: I've done this before! Same idea, same colors and same stamps: in  this  post!!  I stuck to my plan and decided to not fussycut the houses, but stamp them directly onto the background.  The HOW-TO from here onward:  - Stamp the tiny houses and stars onto the background and heat emboss with clear. - Color the houses with watercolors.  - Add white accents with a ... ... gelly roller.  - Add a pavement with the 'bricks' stamp from the same stamp set.  - Stamp some M...

Sketchy Flower Collage by Ellie Knol

Image
I created a square card for you today!  I created the circle by monoprinting with Distress Oxide inks on a 10 cm round gelliplate.  The black stamping was heat embossed in clear, the images colored extra with regular watercolors.  Yes, I got a little carried away with drawing some circles, but I had fun.  The background was toned down with watered-down white acrylic paint, and along with stamping some sequins, I also added real ones.    Rubber Dance Stamps: The Rubber Dance Webshop Sketchy Flowers #1 Grungy Sequins Old Book Page

Christmas in July by Samantha Read

Image
Hello, Samantha here today and I'm so excited to be sharing this Christmas creation with you, I know it's not Christmas for a while yet but I received some new Rubber Dance stamps and I just couldn't wait to play with them, Watercolour Xmas is a stamp set that had been on my list for Santa for a long time, it's a wonderful set that has lots of baubles and bauble decorations for you to mix and match and also some very elegant sentiments too. For this Christmas decoration I've combined six stamp sets, I just love how well they work together. I began with a piece of cardboard measuring 8in x 8 in, I peeled off some of the top layer in places to reveal the lumpy layer, I cut it completely at 2.5 inches and used a hole punch to add the holes as shown. Then I added a coat of white gesso. To get an idea of layout I always stamp images and move them around, this project actually began with a cat and dog together but I don't think they were ready for Christmas and they d...

Bucket of Fun by Samantha Read

Image
Hello, Samantha here today and I'm so happy to be sharing with you this fun decorated bucket project. It could very easily be personalised with names and dates etc. to make a wonderful gift or keepsake to remember a special journey with someone special. I began with a plain white bucket and card. I stamped the images using a 300gsm card as a firm card is needed or the images will flop and curl. To make the insert for my bucket, I cut a circular piece of card and snipped in to the edge all the way around by 5mm, this lets the circle sit snuggly in the bucket. I coloured my Whimsical Summer and the lovely rainbow from What a Girl Wants stamps sets using watercolours. Whilst my images were drying I gave the bucket a couple of coats of white gesso, and then a final couple of coats of an off white paint and splattered the same watercolours all around and then added some lustre spray for a little contrast. Now this is a little fiddly, I added wire to the back of the stamped images and th...

Songbird by Samantha Read

Image
Hello, Samantha here today and I have a tutorial showing how I made this sweet hanging bird decoration using one of the sticks my dog brought home from a walk. Poppy found a stick with lovely markings so I couldn't let it get chewed up, I thought maybe a bird once sat on it, singing a sweet song, that was my inspiration. To thread the wire through I made a hole all the way through at each end, a pokey tool did the job really well. No need to raid anyone's power tools. I threaded the wire through and curled it around to stop the stick sliding off and to make it a little ornate. These hooks could have things hanging off them or beads could have been threaded on to wire above the stick for added decoration. I stamped and coloured my bird, flowers and leaves using watercolours. I added wire to the back of the bird as shown, with some wire extending past the foot, this wire sticks in to the stick invisibly so it really looks like the bird is standing on the stick. To make the wire i...