Posts

Showing posts with the label rubberstamps

Doodle Flowers Tag

Image
  Hi, I'm Vero (@ Vero.kt) and I welcome you to today's inspiration. How's everybody ? I've been playing   with   Mix it up 2   ,   Mix it up 1   ,  Mix a sentiment 3   and   Doodle Flowers     to  create a Tag   that I hope you like . On watercolor paper, I play with different spray inks to create a colorful layer and use a blow dryer to speed up the process.  I choose a stencil and apply micro distress glaze (this medium is waterproof, so the surfaces you apply it to won't be affected by water. You can use it as a resist when applying watercolors or any water-based paint or ink) .) I use a dryer to speed up the process and to add interest and depth to the page, I stamp different stamps with permanent ink . One of the parts that I enjoy the most is the composition, I have to admit that it is  usually the part that takes me the most. A few splashes with white acrylic and we would have our page. Now I leave y...
Atc´s Colorful Leaves

Image
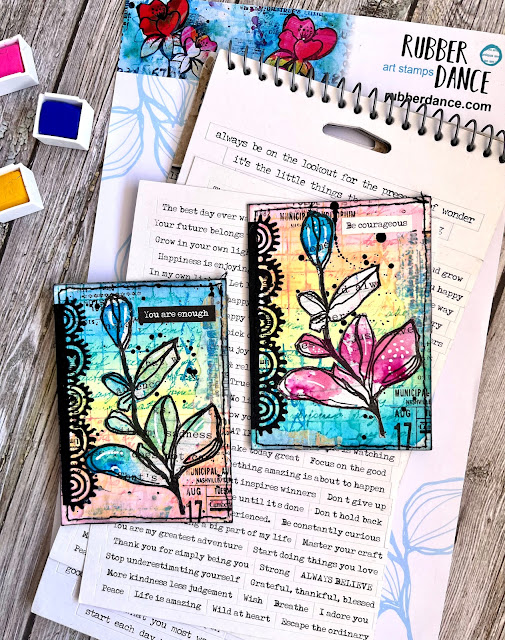
  Hi, I'm Vero (@ Vero.kt) and I welcome you to today's inspiration. How's everybody ? I've been playing   with   Mixed media marks 1 , Pencil marks 3 , Sketchy Leaves  and  Mixed media marks 2    to  create a  colorful Atc´s that I hope you like .   Very easy to do, we started. We cut watercolor paper to a size of 2.5 x 3.5 inches, if you prefer to work in cm, 6.4x8.9. In my case, the paper is smooth and hot pressed, and I color the backgrounds with pigments. W hen the backgrounds dry (we can speed up the process with a heat gun) we will add texture and depth with different inks, in my case I have used distress oxide.To start, I choose a stamp from the  Mixed media marks  , apply the inks, spray water, and stamp, (I'm not looking for definition, I'm looking for a watercolor effect, watery).Help myself with the dryer and go back to stamp with different inks, to continue adding depth and texture. One of the parts ...

Doodle Flowers Atc´s

Image
Hi, I'm Vero (@ Vero.kt) and I welcome you to today's inspiration. How's everybody ? I've been playing  with   Mixed media marks 1 ,   Pencil marks 3 ,  Mix a sentiment 2   and   Doodle Flowers     to  create a  colorful Atc´s that I hope you like . Very easy to do, we started. We cut watercolor paper to a size of 2.5 x 3.5 inches, if you prefer to work in cm, 6.4x8.9. In my case, the paper is smooth and hot pressed, and I color the backgrounds with pigments. W hen the backgrounds dry (we can speed up the process with a heat gun) we will add texture and depth with different inks, in my case I have used distress oxide.To start, I choose a stamp from the  Mixed media marks  , apply the inks, spray water, and stamp, (I'm not looking for definition, I'm looking for a watercolor effect, watery). Help myself with the dryer and go back to stamp with different inks, to continue adding depth and texture. One of the parts ...

Floral ATCs by Angie Coomber

Image
 Hello arty friends, I hope you’re all enjoying the summer. Today I have some floral ATCs for you, I hope you like them. I started by stamping some of the Sketchy Flowers # 3 stamps onto watercolour paper. I used a Derwent watercolour set to colour these in, using red/orange tones for one set and purple tones for the other one. I used water soluble pencils in matching colours to add some shading, then cut them out. Next I cut some ATCs from papers that matched the colours of my flowers, and slightly smaller pieces from book pages. I spent some time arranging the flowers on the book pages and glued them down once I was happy with the layout. I glued the book pages onto the ATCs and then decided that there was something missing, so I used the border stamps to darken the edges a little. Until next time, Hugs from Angie x Stamps used: Sketchy Flowers # 3 Mixed Media Borders  

Scrap Diary by Angie Coomber

Image
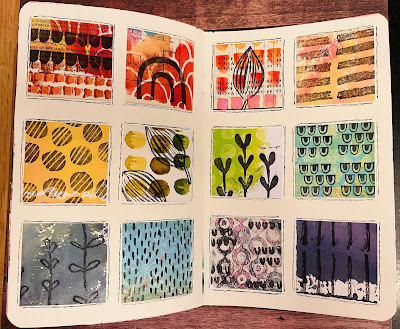
 Hello arty friends, Angie here with a page in my art journal. Recently I have seen someone keeping a scrap diary, meaning they collect bits and pieces from their desk, for example their underpaper or mop up pages, choosing the most interesting sections and cutting them into equal sized pieces, then gluing them onto a page for every month. Over time this provides a kind of record of the type of art you've been creating. I picked the pieces below to start with, about 3 of each colour. I worked out how many pieces would fit on my double page and chose the 12 I liked the most. I used the Carved Collection #1 and Pencil Marks #1 stamp sets to stamp on the squares, using black Archival Ink. Next I roughly sorted the squares into rainbow colours (one of my go-to's when I can't decide which order to put things in, haha), then glued them onto my journal pages. Finally I roughly outlined all of the squares with a black fineliner. I quite like this simple geometric design! Until next...

Pretty Flower Tag by Angie Coomber

Image
 Hello arty friends, how are you? Spring seems to have sprung in this part of the world, it's my favourite time of the year as I love all the spring blossom. I have a tag for you today (I seem to be into tags lately), hope you like it. I wanted to keep the background fairly simple and let the main image speak for itself. I used the "Flowers gone wild" set for this project. I started by stamping 2 of the images onto cream paper, using green embossing powder for one of them and brown embossing powder for the other, then cut them out. Next I stamped the sunflower on a piece of gel printed paper. As you can see I often use 3 colours and slightly blend them, that way you have a ready made colour scheme for a lot of stamps. This works especially well for flowers. I'm not really a lover of colouring in! I cut a tag from a piece of cream card and splattered some watered down gold paint on it. Once this was dry I arranged the flowers on the tag (or "auditioned" them,...