Posts

Showing posts with the label Majo

Find your destination ► Majo
Image
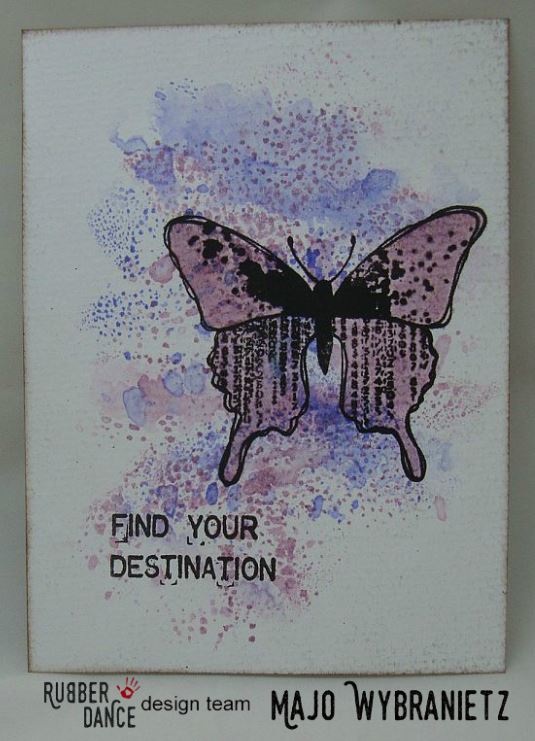
Hi Folks, today I show you a rather CAS Art Journal page, which usually isn't my style, but this turned out just the way I wanted it, very soft and simple. Sometimes life gets a bit rough, this made me settle down.... I show you some close ups .... I have used the following stamps: Grungy Butterfly #4 Sentiment from Grungy Butterflies  Have a great time for the rest of the week and Happy Crafting ♥

Crafters Manual ► Majo

Image
Hello my friends, It’s Majo here today with a little book I made for my friend to use as a technique/material/color reminder. Our new journal stamps just fit the theme. Well, I couldn’t resist using flowers on the cover. You already now, that they’re my all-time favorites. I inked a panel with Distress Inks Victorian Velvet, Fossilized Amber and Tumbled Glass. After stamping my flowers, stems and leaves I fuzzy cut them and added more ink on parts of them to make them stand out from the background. I cut the book cover and also the signatures and the spine. I used the journal stamp on the signatures as well as the little boxes where she can add the colors she used.  Each page on the signature also has one of the little images in the corner according to the colors I used.    I left the left sides of the signatures blank, my idea was to use it for a drawing or a little photo as a reminder. Some close ups and ...

Winter Wishes ► Majo

Image
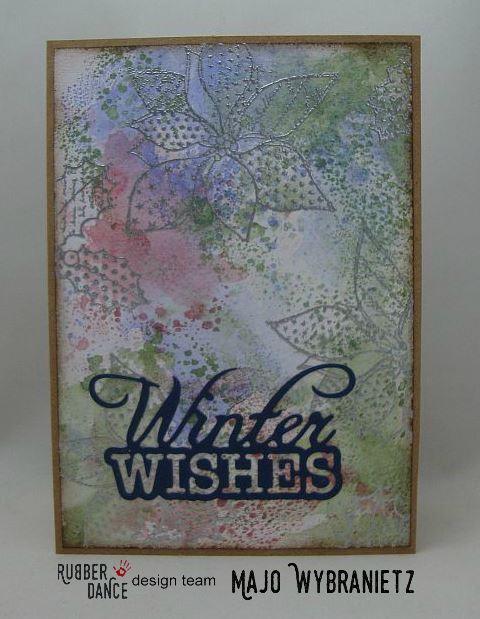
Good Morning, my friends! finally it's time to show all the Christmas Cards I made with the beautiful new set Textured Christmas Green . This set is so versatile, I made quite a few cards, I show them on my blog. I started by applying distress inks to a large watercolour paper panel and cut it down to the size I needed for my cards. I stamped the poinsettias and the leaves with distress embossing ink from Ranger and heat embossed the images with silver embossing powder. I used a Sizzix die for the sentiment.  All cards are quite the same, since I make a lot of them, but by changing the colour of ink and the embossing powder, you get a new impression every time. Did I mention, that I ♥ this set? Some close ups ...  The set I used:   Textured Christmas Green Here you can get the stamps: I hope you all have wonderful holidays among family and friends. Thanks so much for joining our blog throughout the year fo...

A little dream ► Majo

Image
Hello everyone, welcome to the Rubber Dance Stamps blog where today I have card to share with you. My teamies almost always create the wildest things with the awesome stamps, today I'd like to show you that you can also make a birthday card which would suit to give to Mom, Grandma or any other "dignified" person :) I have used the crazy flowers from the Set #1 , designed by my teamie Melina Dahl .     I started by creating my Master Board with Distress ink: Wild Honey, Barn Door and Peeled Paint.   I stamped and fuzzy cut the flowers, the stems and the leaves and added some bleach to set some highlights. The sentiment was stamped with Distress embossing ink and heat embossed with Stampendous Detail White powder ... and ready is my card for either a birthday, just as a little present or any other celebration. I love the bright colours on the black panel.   Some closeups ... I have used this set for my card: Craz...

Upcycling ► Majo

Image
Hello my friends, It’s Majo here today to show what a neat little present you can create with an old tin can and the awesome Butterfly stamps. I started by creating my Master board, using Distress Oxides *Spun Sugar*, *Bundled Sage*, *Antique Linen* and *Tumbled Glass* together with a lot of water, making sure to dry all layers very good in between. I used   a stencil for more texture and stamped the Textured Flowers in different sizes, ready to go. I cut a panel to fit the size of the tin can and stamped the butterflies with Black Archival Ink and 13 words of the "Mix a sentiment" set with Distress Ink *Bundled Sage* to stay in my range of colors. I pressed all four pads on my worksheet and colored the butterflies by just taking off the color with a brush and some water. I just love it when things go together smoothly. This is my finished panel ....    And here are some close ups of the beautiful b...

Wild and Free ► Majo

Image
Hi Folks, Majo here today to show you a page of my little Art Journal. I must say that I always love silhouette stamps. The solid butterflies are very special to me. The silhouettes or solid images can be inked in different colors, which makes them look more alive. In my case I used Tsukineko Versafine Onyx Black on my first round of stamping, then added in in the colour of my background. I love it. But let's start at the beginning. I inked the page of my litte art journal with Ranger Ink *Shaded Lilac* and *Spiced Marmelade* and used a Darkroom Door Stencil with Shaded Lilac also. I added the vintage script image and then on top the Butterflies solid stamp as described before. I *framed* my page with the thread stamp and distressed all edges. Some close ups for you ..... Stamps I used: Vintage Script Solid Butterflies Sentiment from Grungy Butterflies Thread from Grungy Borders Please don´t forget that we have a challenge each ...

*Get whale soon* - Giftbag ► Majo

Image
Hello my crafty friends, today I will show you how I made a gift bag with the fun stamp set *Whale Wishes* . I will give this bag to one of my friends along with a "Get Well" card and some treats.   I started by stamping my main images on watercolor paper and masked them with Schmincke drawing gum.   I applied Distress inks in Spun Sugar, Tumbled Glass and Bundled Sage and spritzed it with some water to make the texture look a little more rough.   I stamped the bubbles with white ink from Stampin' Up and heat embossed them with Stampendous Detailed white embosing powder. I also added the small circles from the set.    After removing the masking fluid, I started to colour the images a bit with the shades I used before and I also added more texture to the background with the smaller bubbles stamp.   I added a piece of cardstock with the sentiment with pop dots, adhered the panel to the bag and here we go, ready is m...