
Take Flight
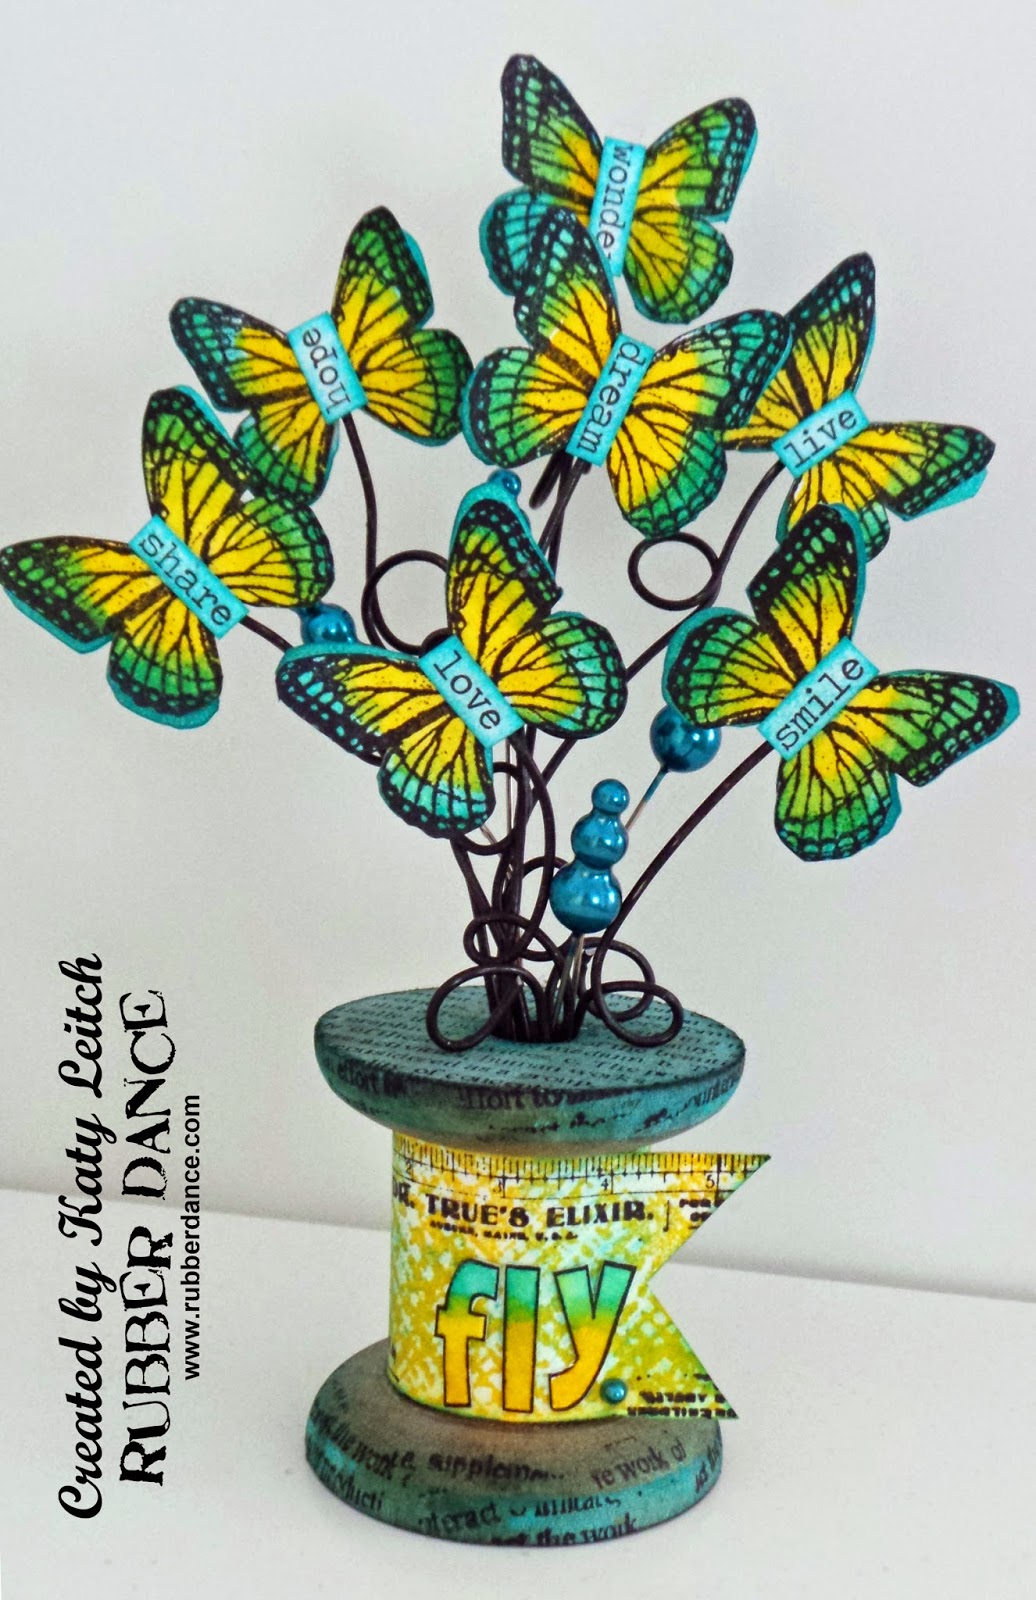
Hello everyone! My make for today is a little something to brighten up my craft space. I found this old fashioned, oversized cotton reel in my local craft shop - it found its way into my shopping basket but it's been sitting unloved in a drawer for quite a while! Now thanks to these lovely Rubber Dance stamps it's a little piece of art, bursting with fluttering butterflies and inspiring words. I used images from lots of different sets here - showing how well RD stamps mix and match.
I was really quite easy to make - here's how!

STEP 1: Stamp lots of butterfly wings and colour them using Distress Sprays and a paintbrush, blending the colours. I used Peacock Feathers and Mustard Seed. Cut them out and ink the backs with Distress Ink (as some of the back will be visible).

STEP 2: Cut some narrow strips of cardstock and join pairs of wings together on the reverse. Allow the glue to dry before going on to the next step. I made 14 pairs of wings.

STEP 3: Shape some pieces of florists wire to make loopy wire structures of different lengths (I wound the wire around objects like a pencil or paintbrush to make the loops). Glue the pairs of wings back-to-back to the top of each wire piece. This is best done with strong wet glue.

STEP 4: Trim some Tim Holtz Chit Chat stickers and ink them lightly. Glue in place in the centre of the butterflies. Bend the tips of the wings out slightly to give them shape and movement.

STEP 5: Use some paint to distress a cotton reel. Stamp text on the top and around the edges with permanent black ink.

STEP 6: Stamp a length of card with the Burlap stamp in Mustard Seed Distress Ink. Add some touches of Peacock Feathers ink and black stamping with the ruler image. Stamp the word FLY onto another piece of paper, colour using the same method as for the butterflies and glue in place. Wrap the card around the cotton reel and secure with glue.

STEP 7: Turn the cotton reel upside down. Squeeze PinFlair or silicone glue into the hole. Add something to block the hole and stop the glue splurging out (I used a bit of foam).

STEP 8: Stick the wires into the glue-filled hole, placing them with the shortest at the front and longest at the back. Add some additional curls of wire close to the base if desired. Finish with some stick pins. When the glue is dry you can gently bend some of the wires to adjust the placement of the butterflies.
Hope you've enjoyed my tutorial!
Katy x

Collage Elements 1

Burlap

Da Vinci (art defintion)

A Little Birdie (word 'fly')


Comments
xox
xox
You make things look so effortless
Love watching you work xxx
Barbx