Stamped Clay Bracelet by Susanne
Hi everyone!
Today I'd like to share a jewelry project with you. I created a chunky bracelet by stamping on polymer clay. You'll find detail photos and step by step instructions in this post.
Supplies:
ca. 50g White and 50g Pearl Fimo (or similar clay, any brand)
Stamps and other stylus tools
Pasta machine would be good, also a cutter blade
Acrylic paint (anything dark, I mixed black and brown)
Elastic cord
Some twine
Bone folder
Something round like a marmalad glass, a glass bottle or something like that with a diameter of nearly 8-10cm (cover it with aluminium foil)
Any bead for the closure
Sharp kitchen knife
Of course an oven to bake the clay
Waterproof sandpaper (about 300 grit)
Step 1:
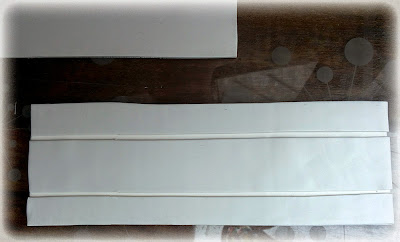
You will need different sheets of your clay mixture (white and pearl). One for the backside, one for the middle part and one for your stampings. You should choose the size you need and want. I used a length of 19cm and a height of 6cm (fitting my highest image). I conditioned the clay with my pasta machine using a middle setting.
Step 2:
Stamp your images by spraying your stamps with some water (so that the clay will not stick to it) and press it into your clay. It might be a good idea to test this process first on a piece of scrap clay. Just to get some feeling for it. Be sure to clean your stamps very well after you worked with polymer clay!!!
I used other stylus tools as well in addition to the stamps.
Step 3:
Press the middle part onto the backside.
Add some twine into the openings to protect them and press the "cover" on top:
Step 4:
Sorry, I missed it to take photos of this step. Take your bone folder and press it into your bracelet where the single parts should be cutted after baking. Press it not too deep. Take your "construction" and lay it arround your glass (or other round and heat-proof object). Tie the ends of your thread together to fix it. Now you can put it into the oven by following the clay manufacturer's instructions.
Step 5:
After baking you can cut the pieces apart with a sharp kitchen knife. Take your waterproof sandpaper and sand the sharp edges under water.
Paint every part with acrylic paint and wipe the color away with a damp cloth rag.
Step 6:
Thread your finished beads onto the elastic cord. Build the closure by tying an extra bead on the end. This bead can be run through the cord loop on the other end.
If you have any questions please feel free to ask in the comments. Thank your for stopping by today. See you soon,
Susanne
All stamps I've used are from Rubber Dance:
Collage Mix
Vintage Birds
Think again
Round in Circles
Weed Love
PS: The DT and I would like to say Hurray, Hurray for Norway and all our Norwegian readers on your National Day today, the 17th of May! And of course a big hug to our Norwegian "boss" Bibi, the owner of Rubber Dance. We hope you all have a fun celebration!


Comments
♥
I agree with you - that bracelet really shows the stamps off. I've never made anything like this either, but it sure would be fun to try. I'd be super proud to wear something like this!!
♥